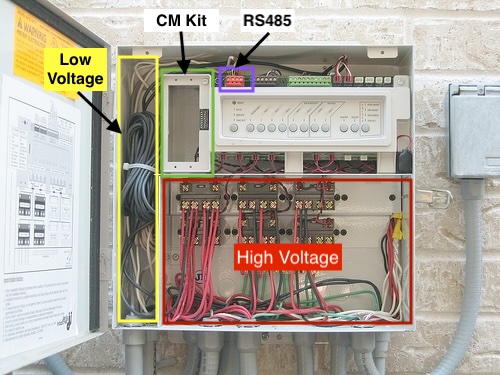
Mounting in an enclosure
AqualinkD CM Kit is designed with multiple mounting options that will suit most installations / enclosures
- Our preferred case for moderate climates is the LeMotech Electrical Box 5.9"x3.9"x2.8"
- For hot climates a metal case is preferred, white diecast aluminum is the best followed by steel, ie VEVOR NEMA Steel Enclosure, 8" x 8" x 6"
- Any case with internal dimensions of around 6"x4"x3" should give you enough room, go larger if you want to mount the antenna inside the enclosure, or are in a hot climate (more air volume to act as a thermal buffer)
- It's IMPORTANT to note when selecting an enclosure that you DO want it water tight, but you DO NOT want it air tight. The two are at odds with each other I know.
- If the enclosure is air tight, then any temperature changes will cause pressure build up inside the box, which will not let CPU to cool, and also lead to water being sucked inside the box when it rains
- Simplest solution is to not make the cable holes air tight. Alternatively you can drill a few small vent holes in the bottom of the box
- The cable gland that comes with the above mentioned box are water tight, we simply don't screw the gland tight against the cables and that provides enough airflow
- Aluminum: The top choice because it acts as a high-performance heatsink; it pulls CPU heat to the outer walls and reflects more solar radiation (if painted white or light grey)
- Steel: good choice that is extremely rugged and durable, but it conducts heat much slower than aluminum, again should be painted white or light grey
- Plastic (Polycarbonate/ASA): it acts as an insulator (trapping heat inside like a greenhouse)
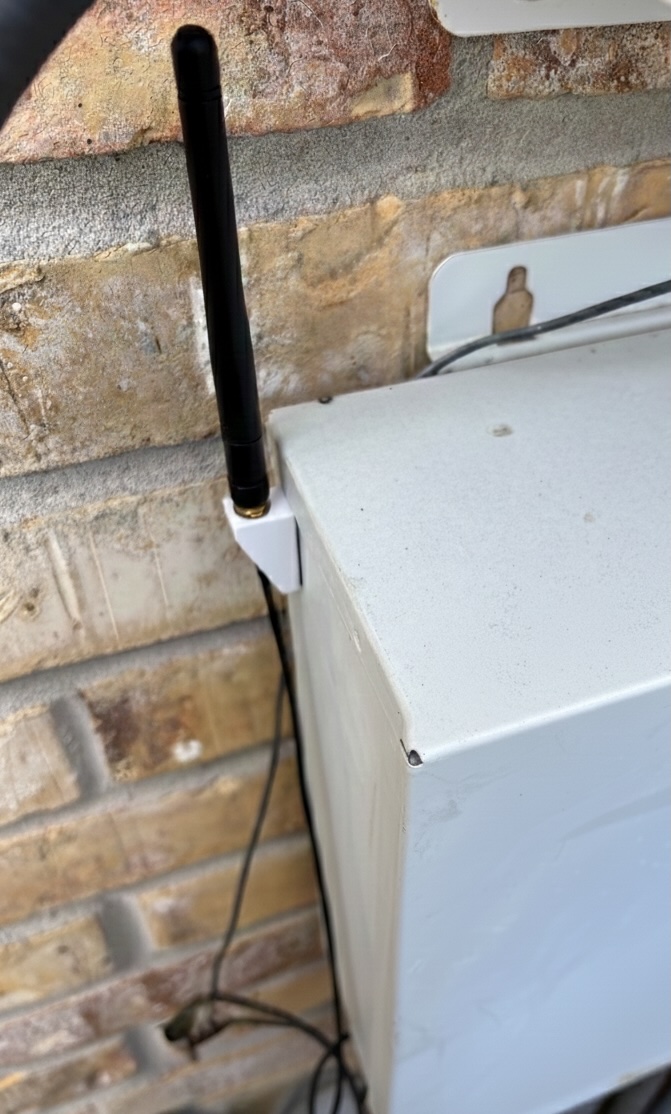
- Antenna must be mounted outside the box if it's metal, but can be mounted inside if it's plastic (as long as the box is large enough)
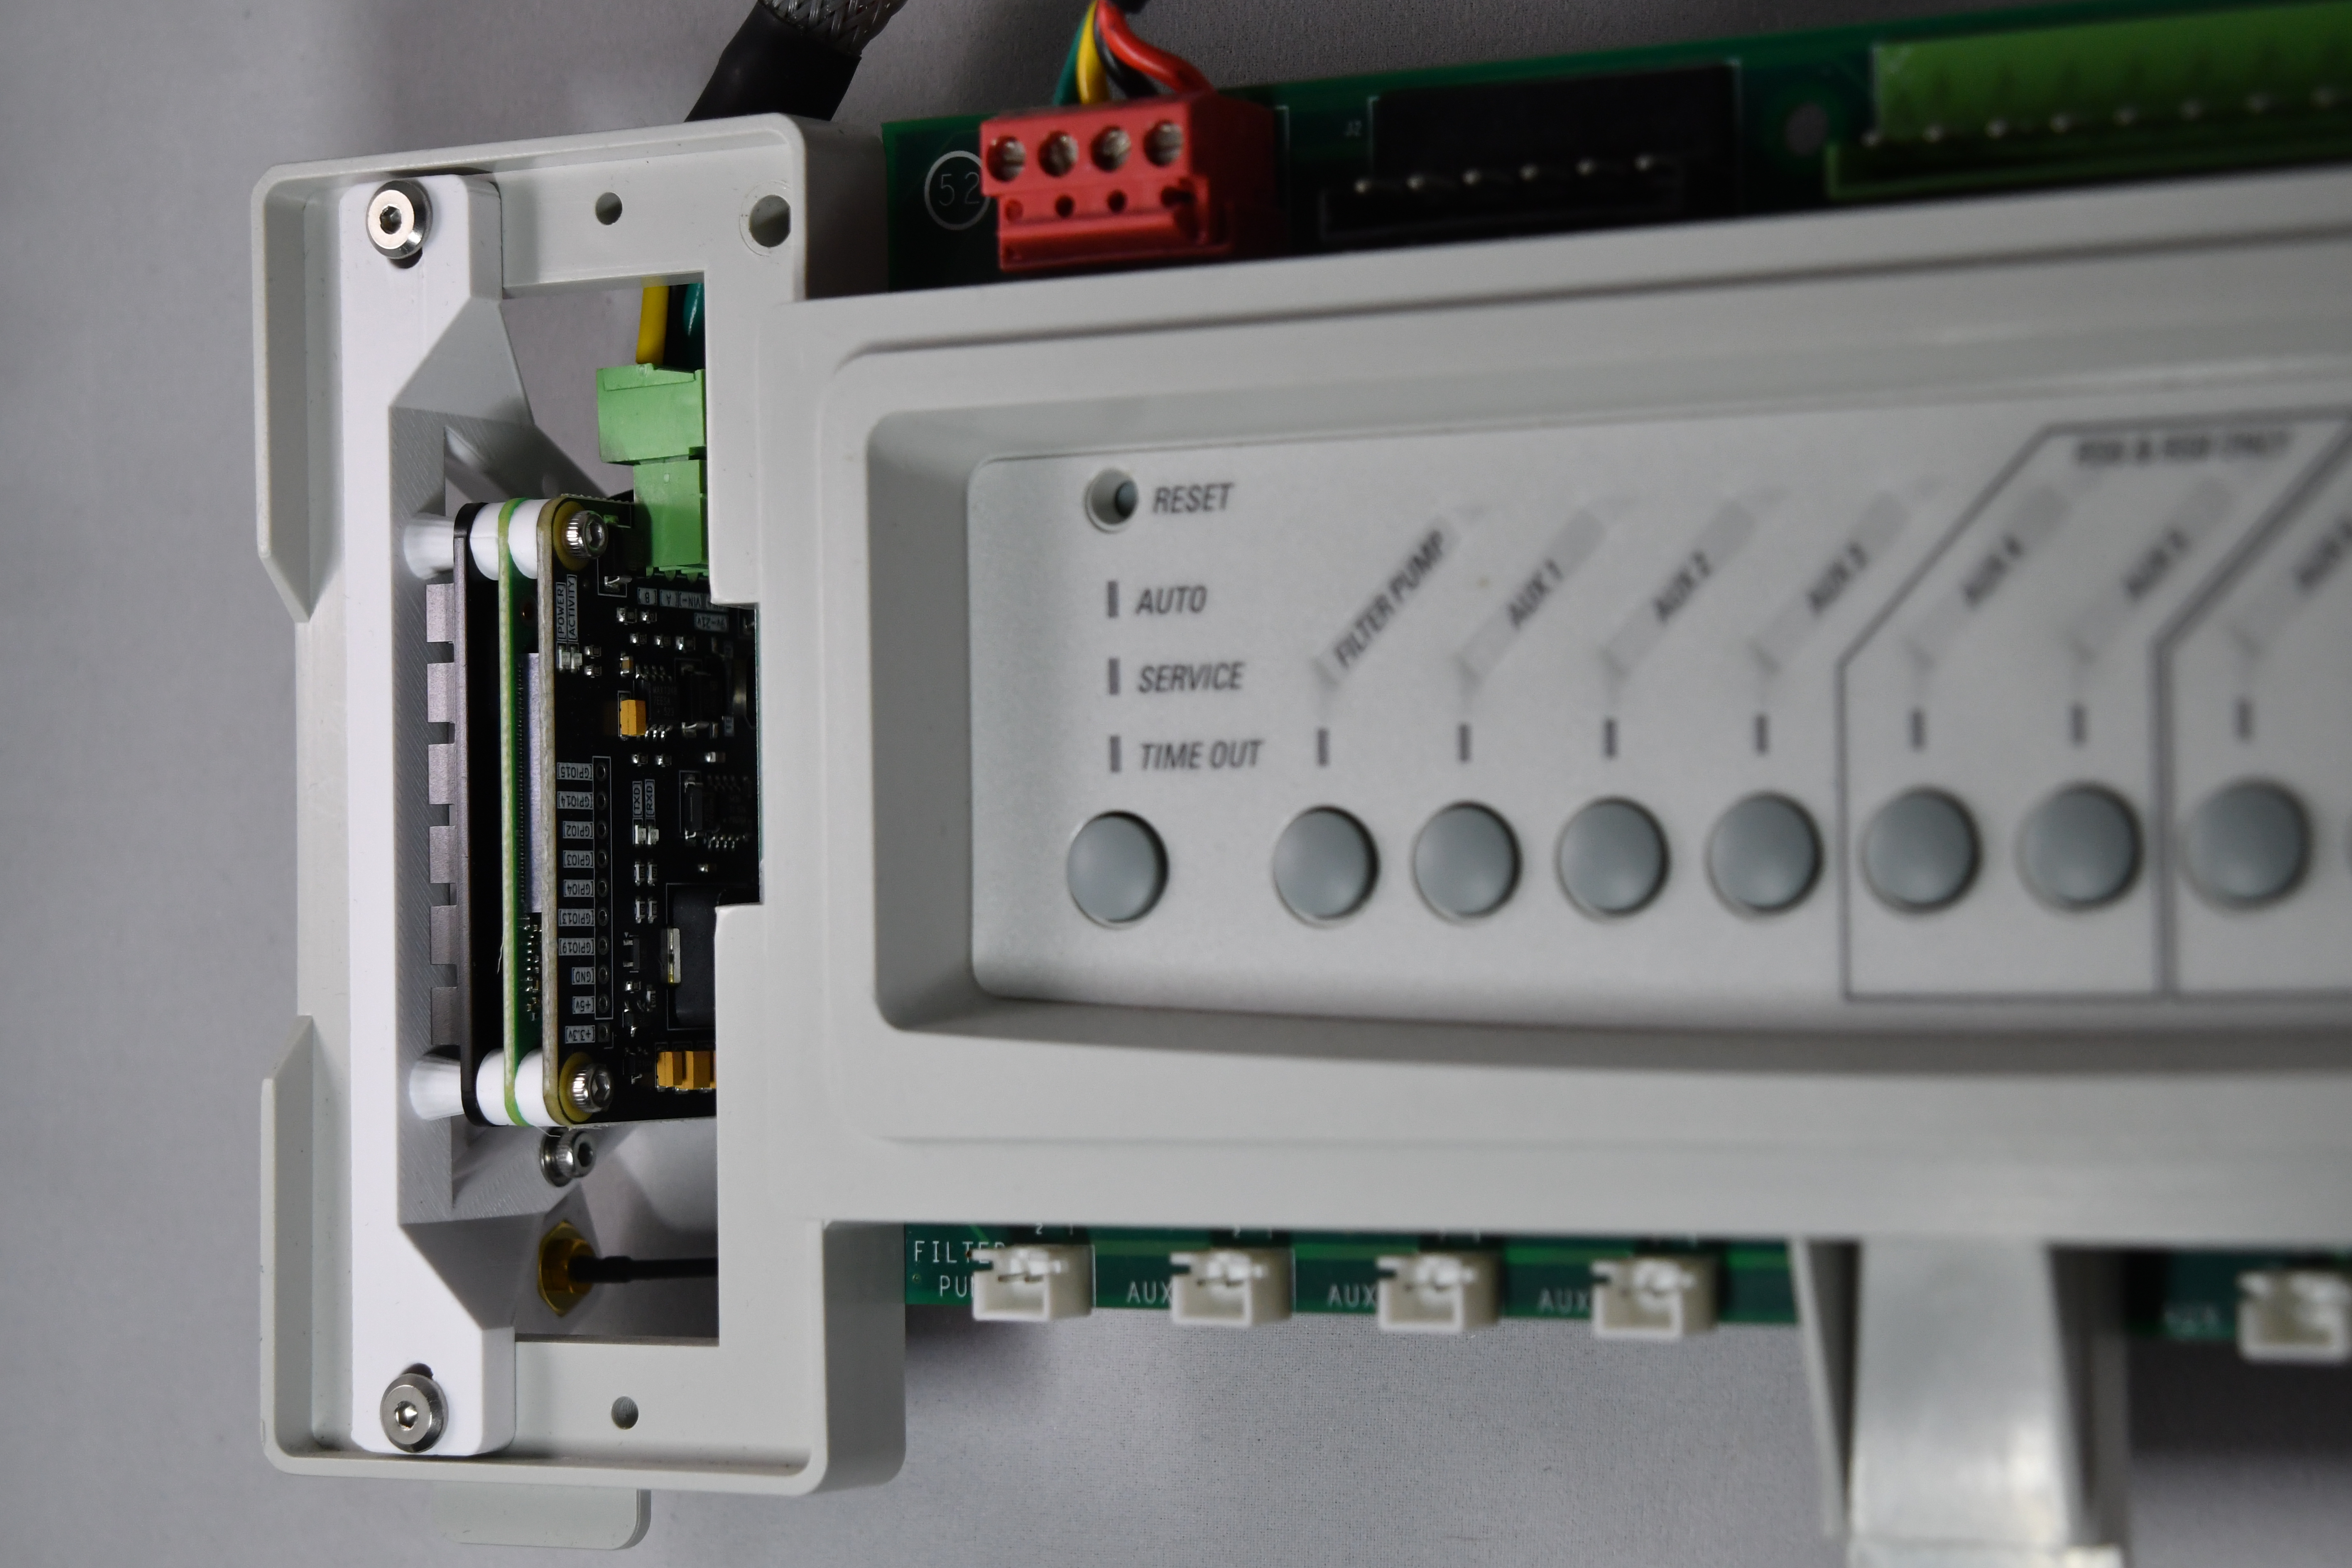
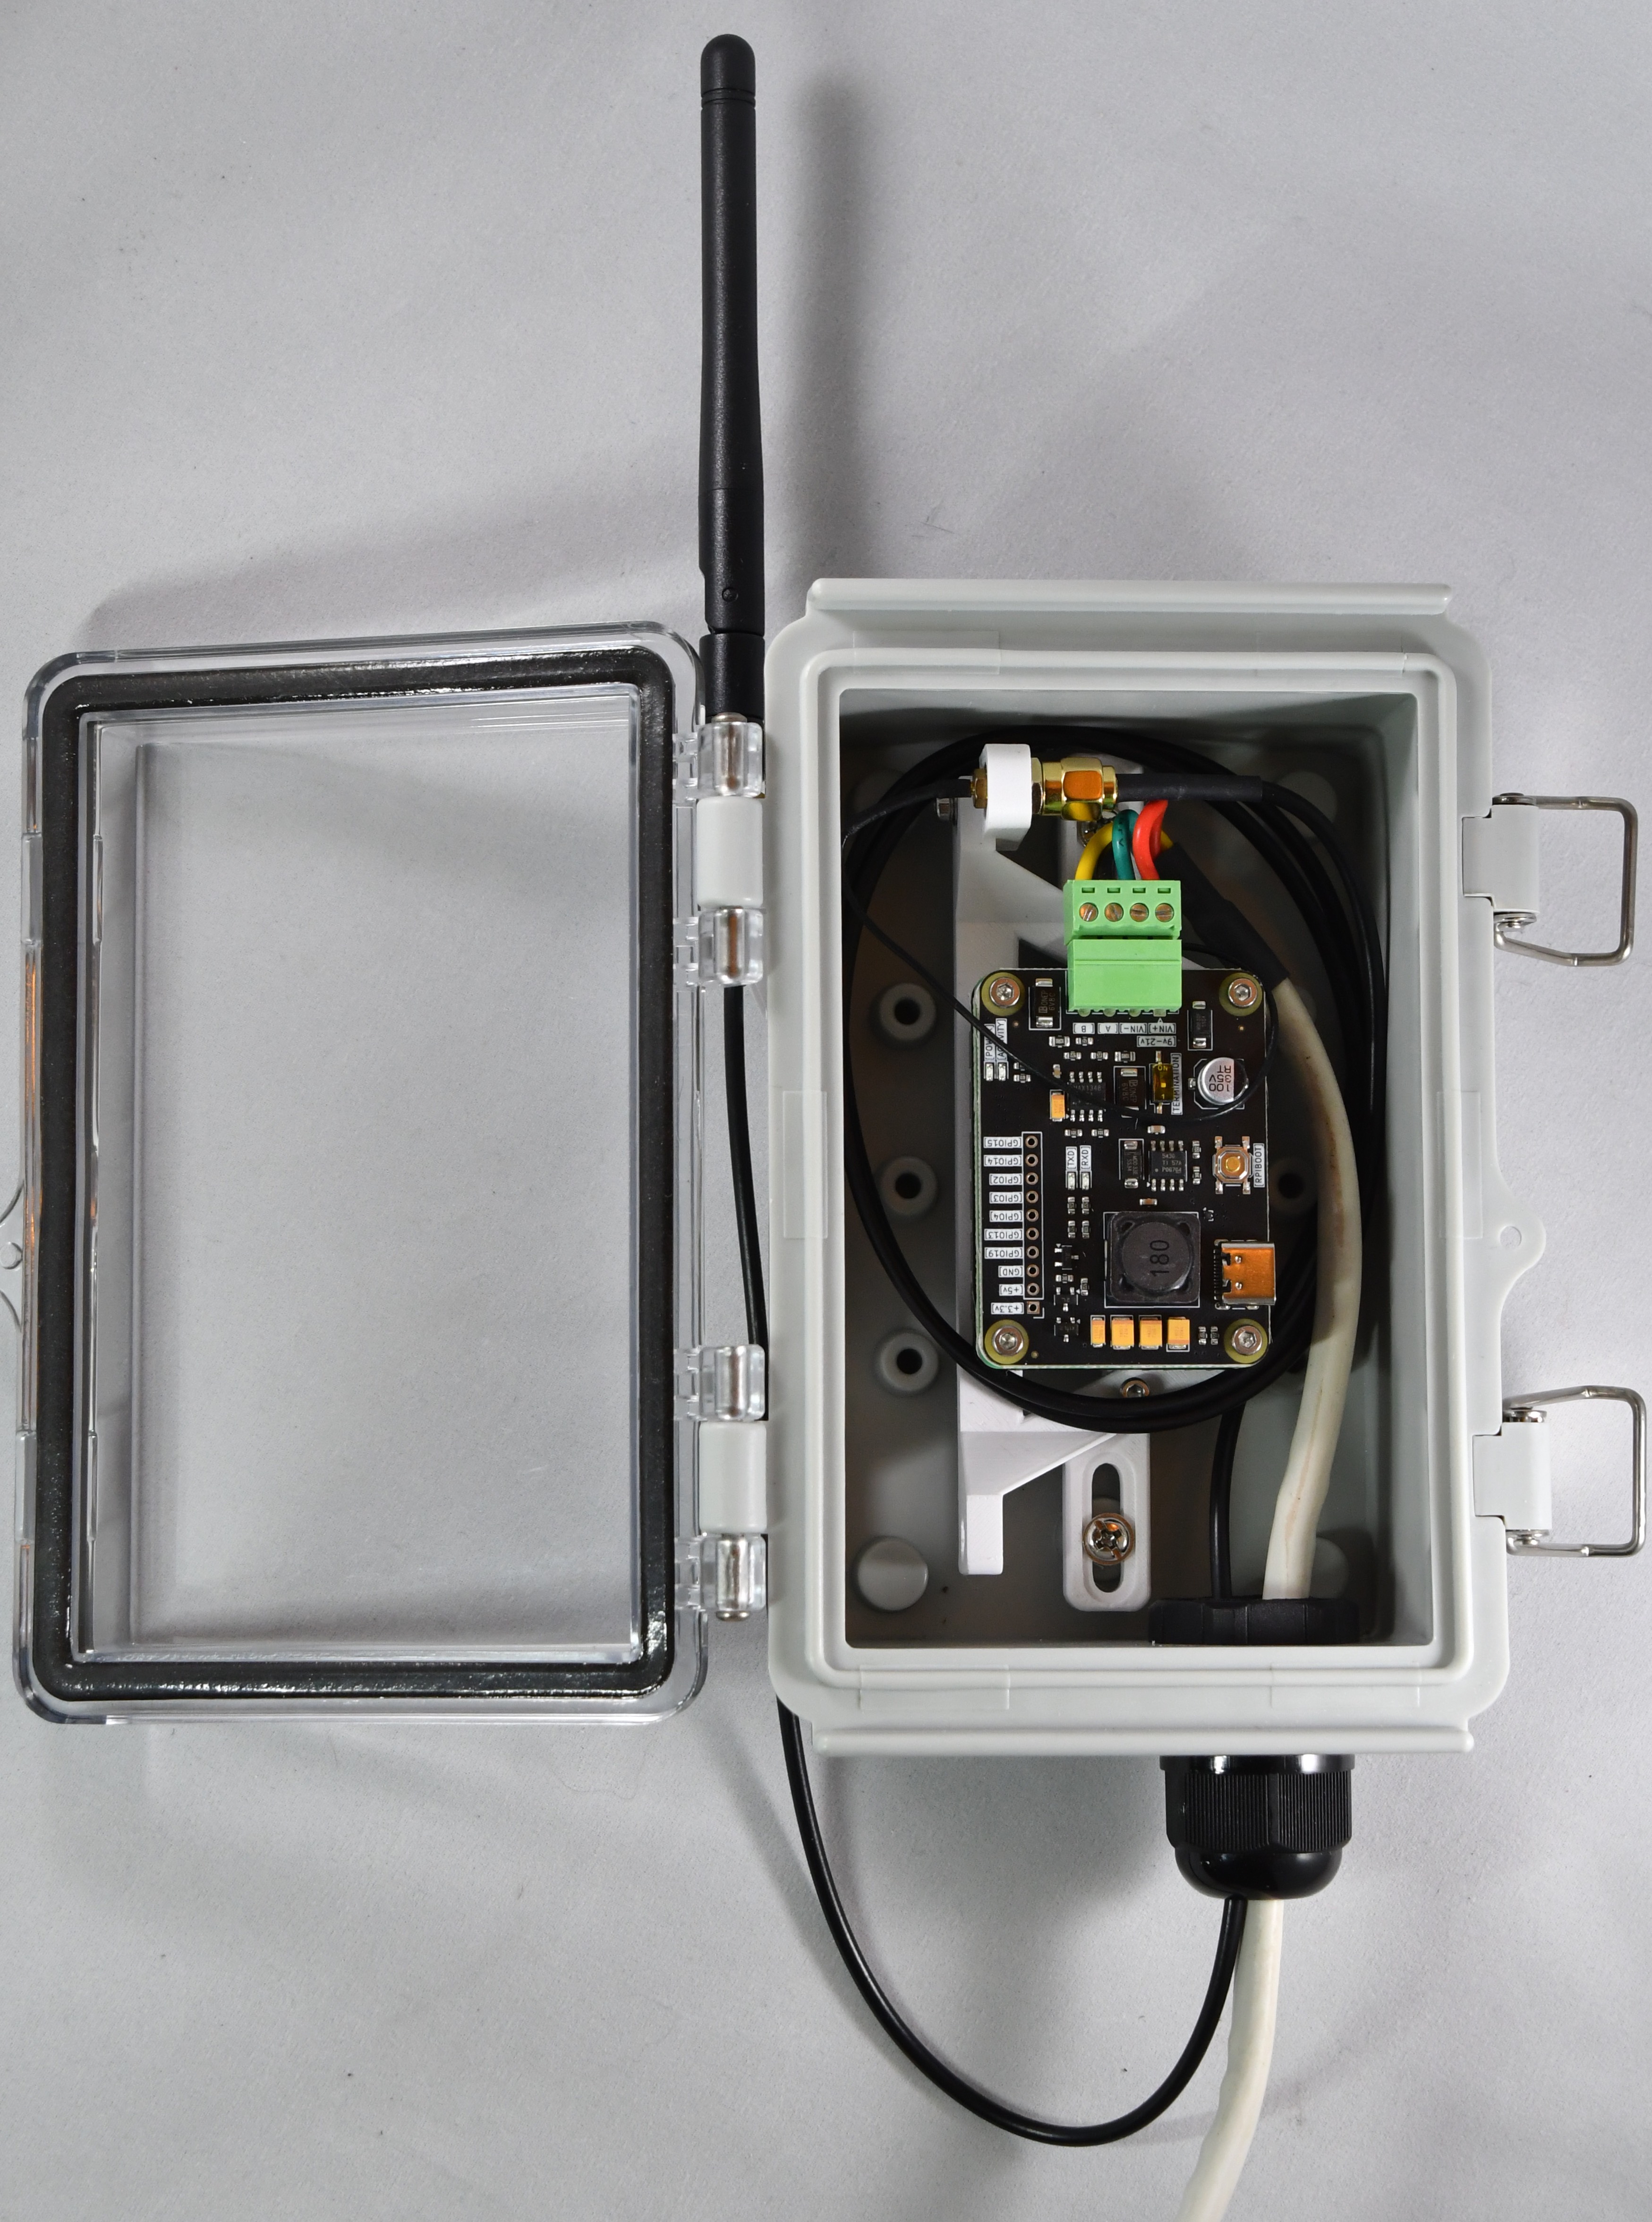
Below (left) you can see our preferred way to mount in an external enclosure, Another option is shown on the (right).

|
|
|
Click above pic to expand
|
Steps to mount in external enclosure.
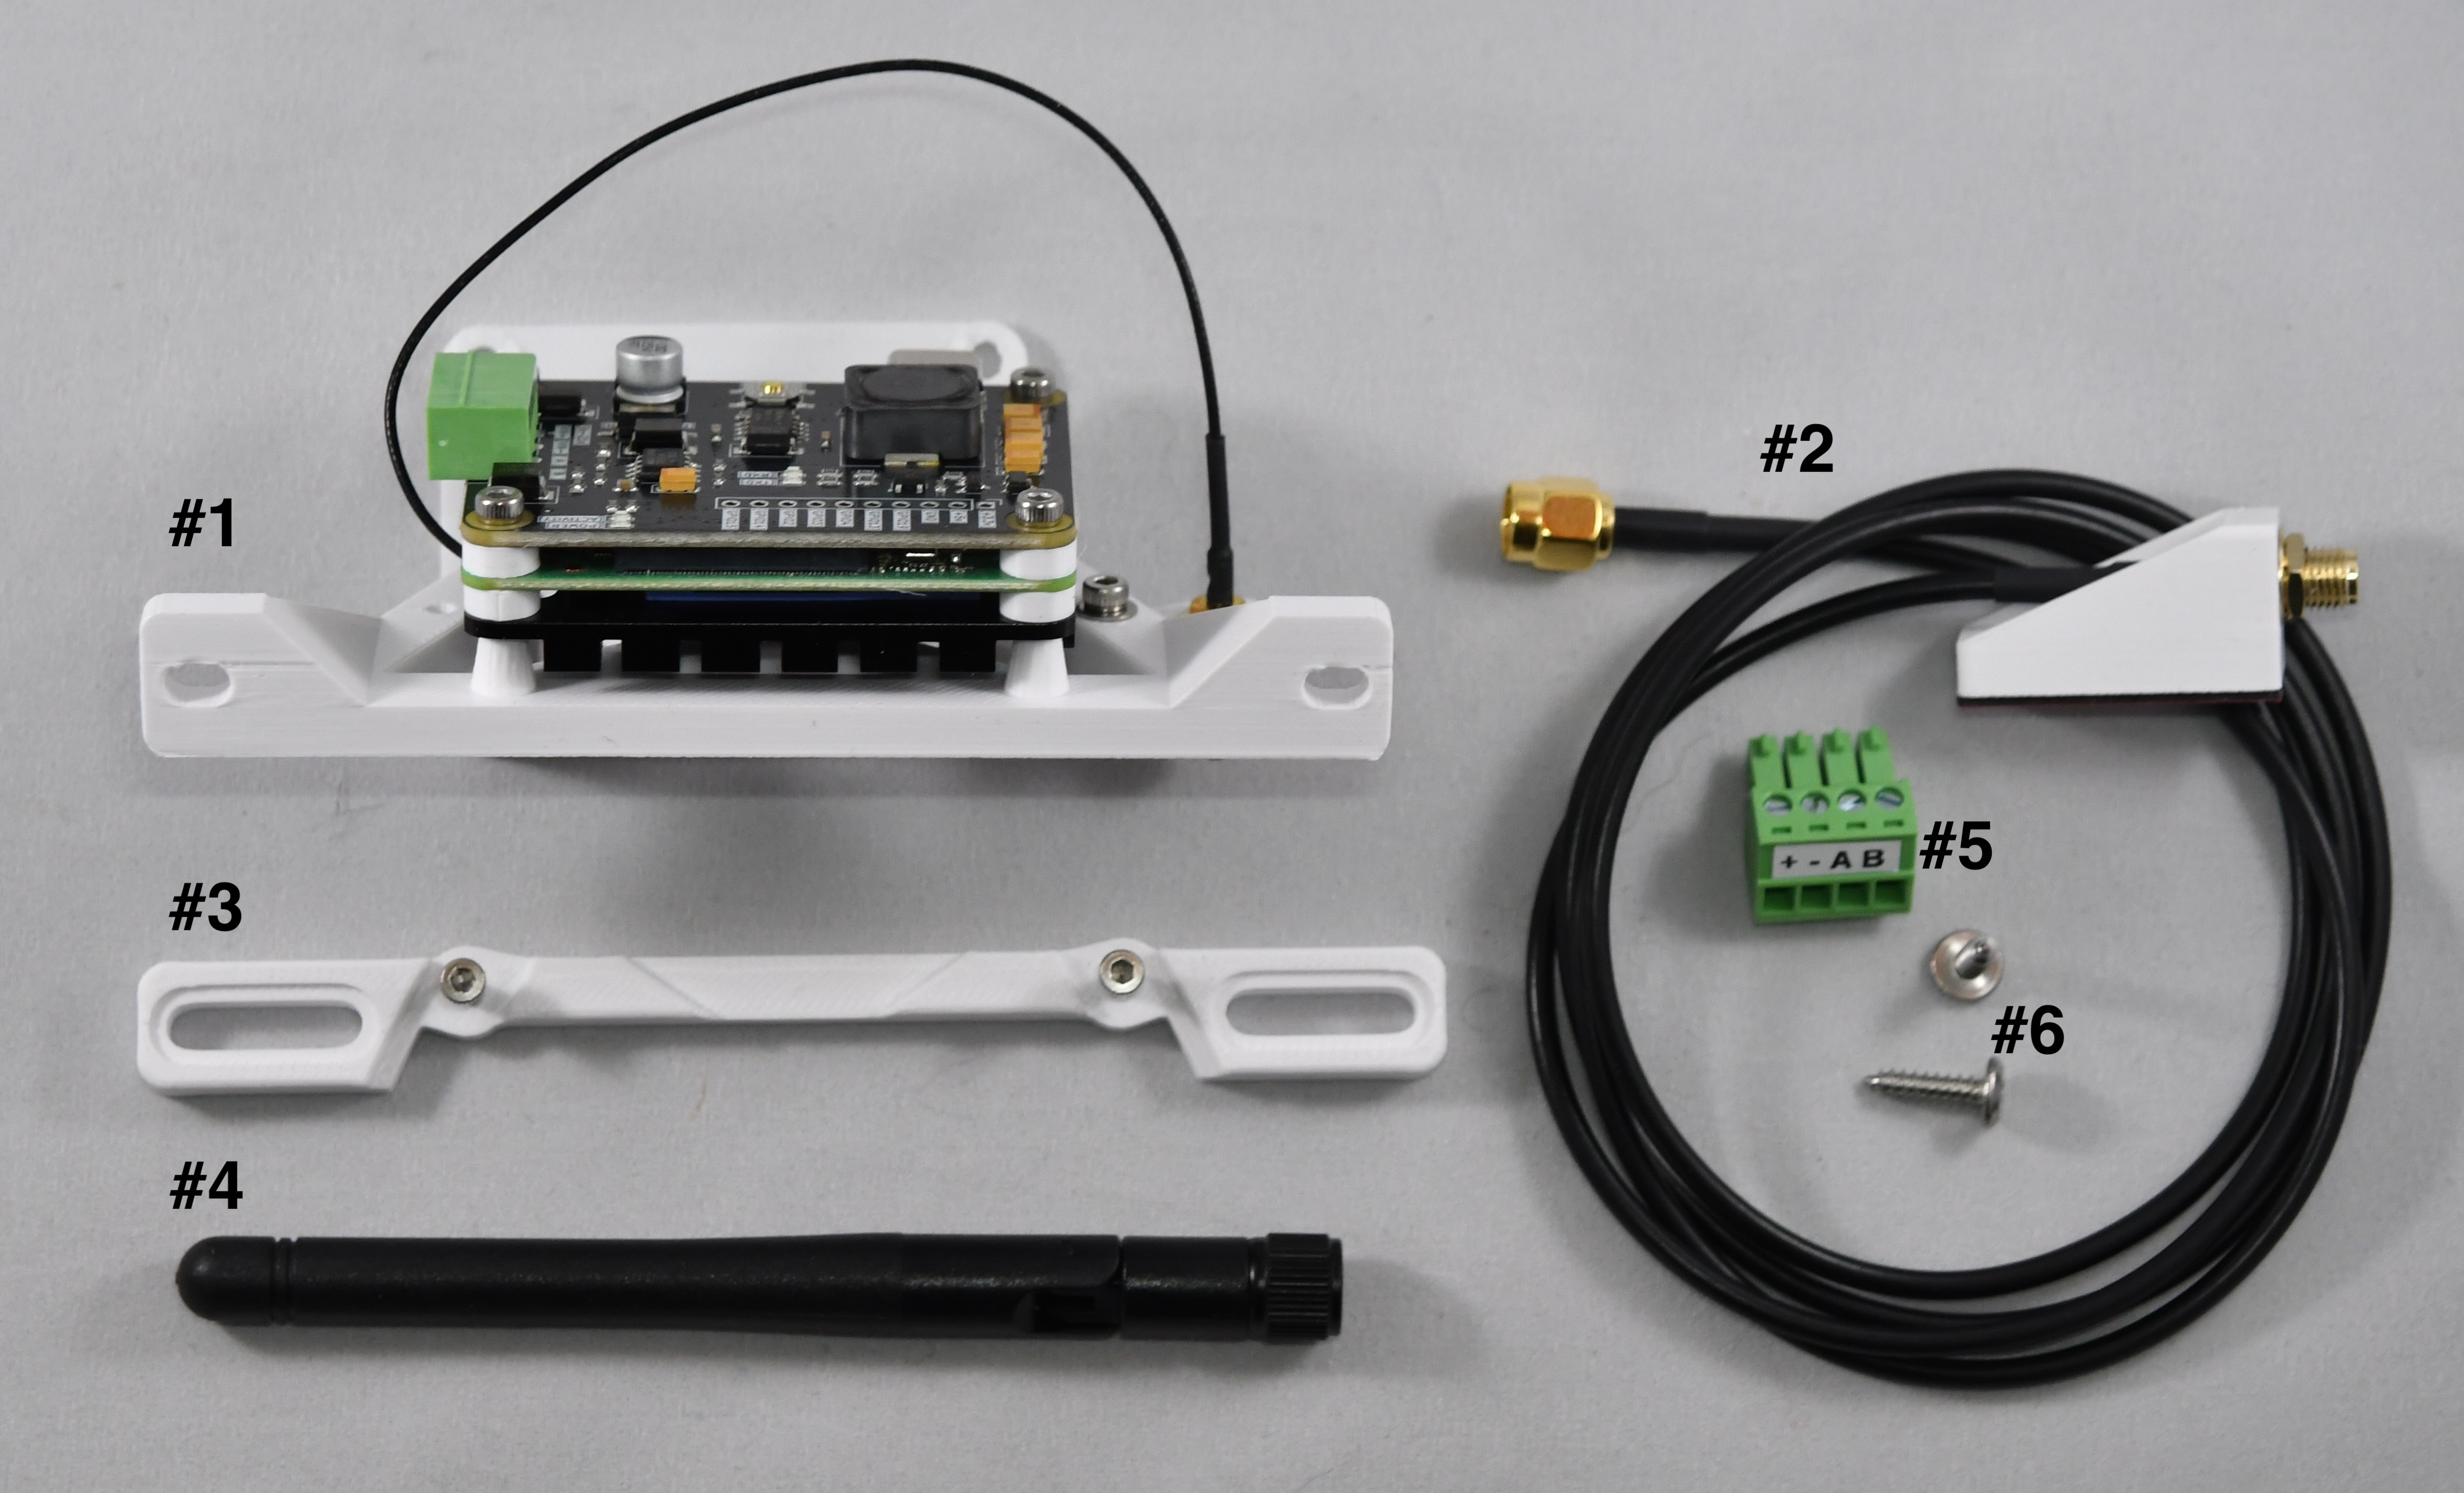
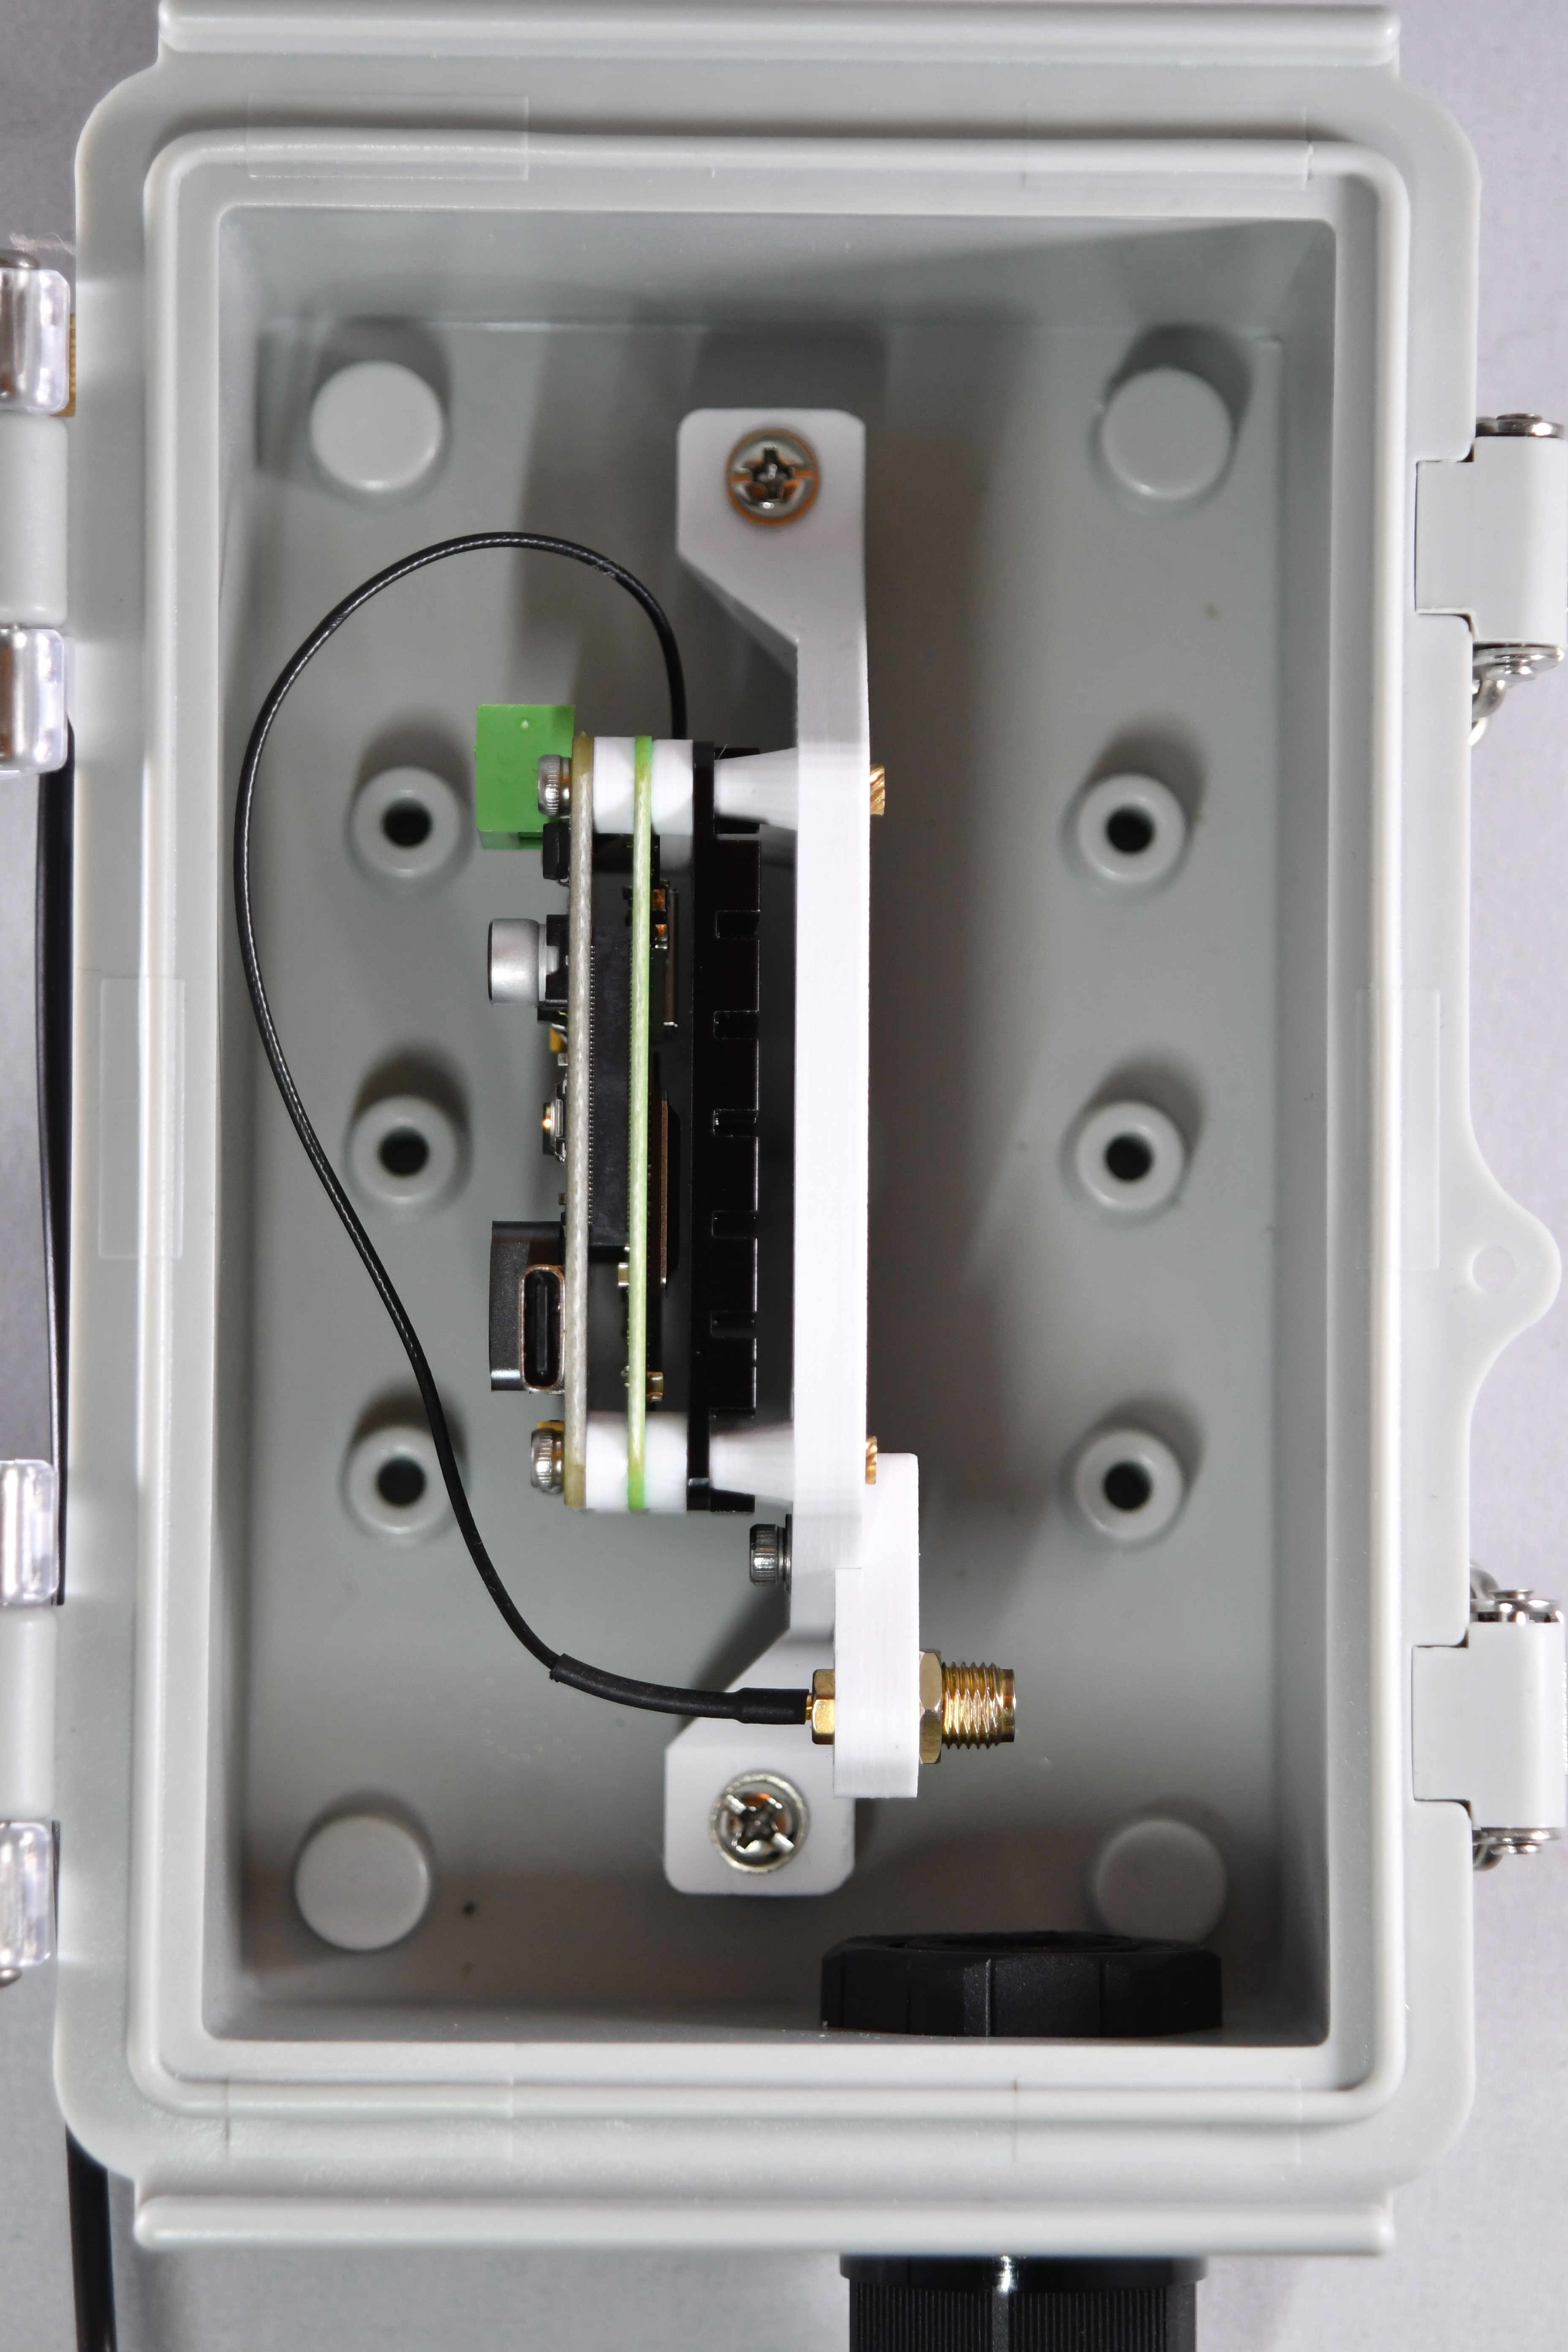
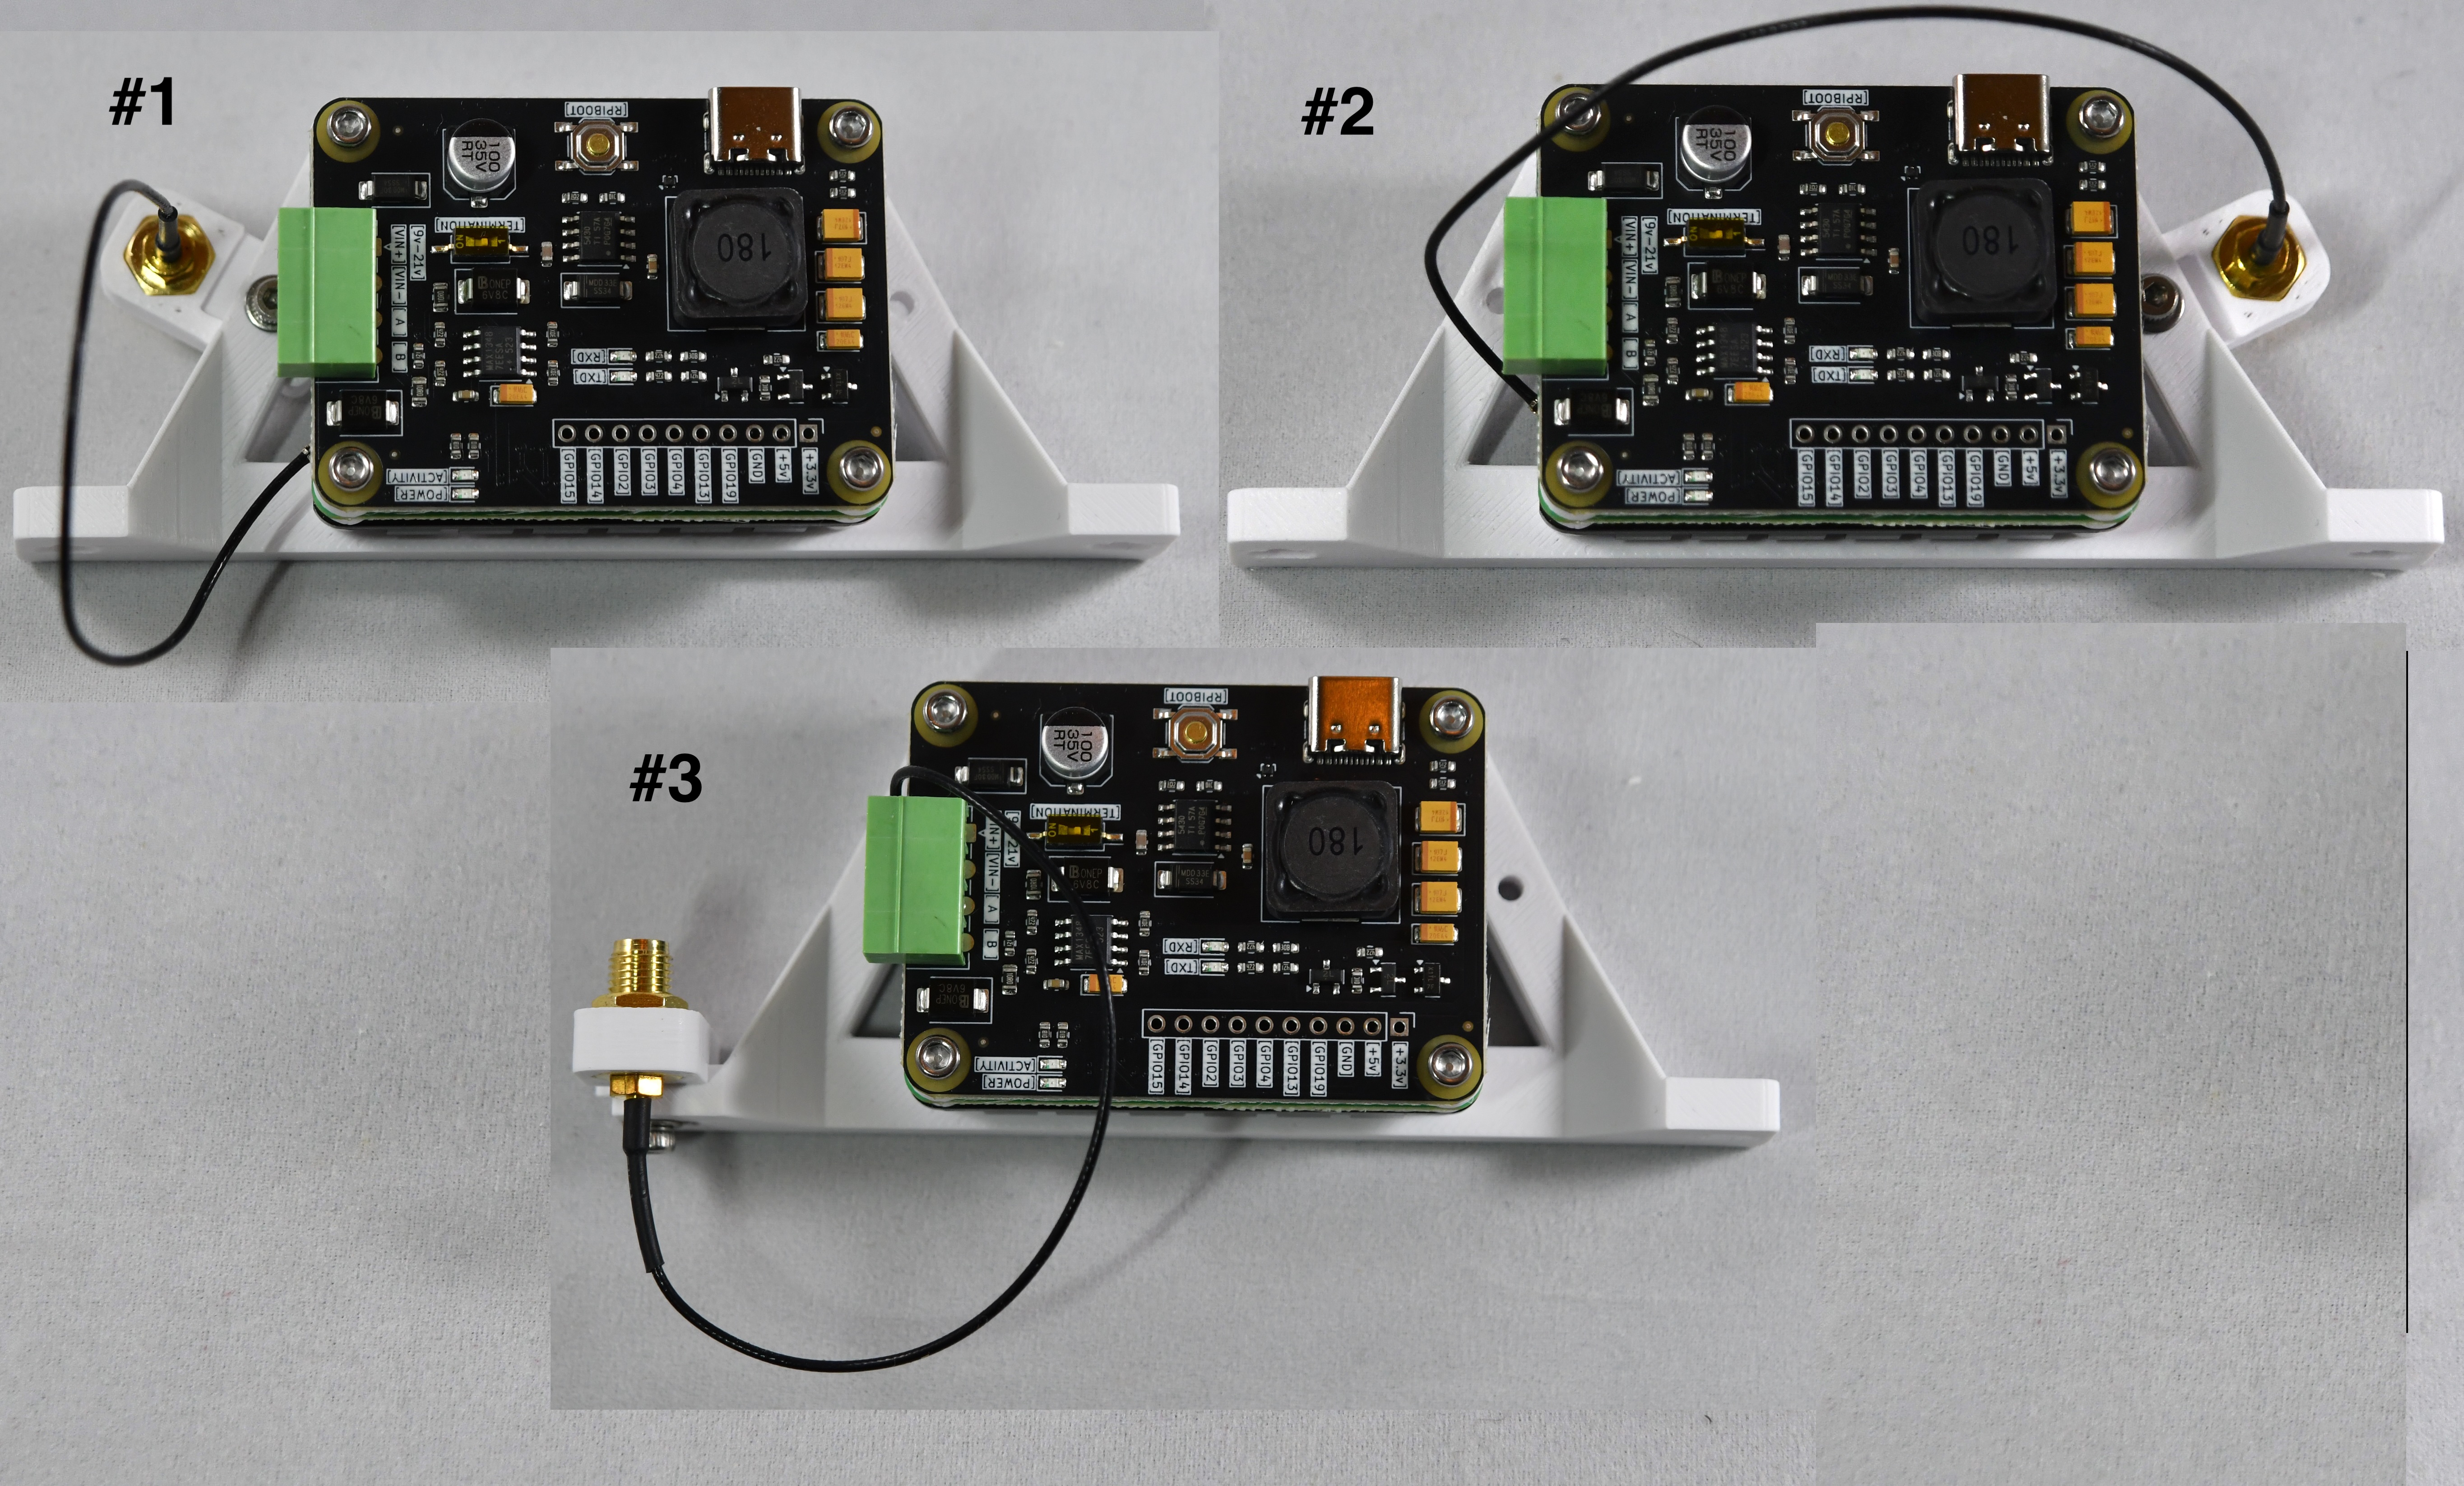
- Remove the antenna pigtail mount from the frame by removing the M2.5 allen bolt.
- Be very careful not to disconnect the pigtail wire from the CM4 board, it can be very hard to get back on
- Attach the External enclosure mount as shown here
- Attach the antenna pigtail mount so location #3
- If you are using a plastic box, the antenna can be mounted inside if the box is large enough, this will NOT effect the antenna performance
- If you are using a metal box, the antenna MUST be mounted on the outside
- The antenna can be mounted directly to the pigtail mounting inside the box
- Attach the external antenna mount to outside of box (if needed) and run the cable to the inside of the box and connect to pigtail inside the box
- Follow instructions here
External Frame mount.
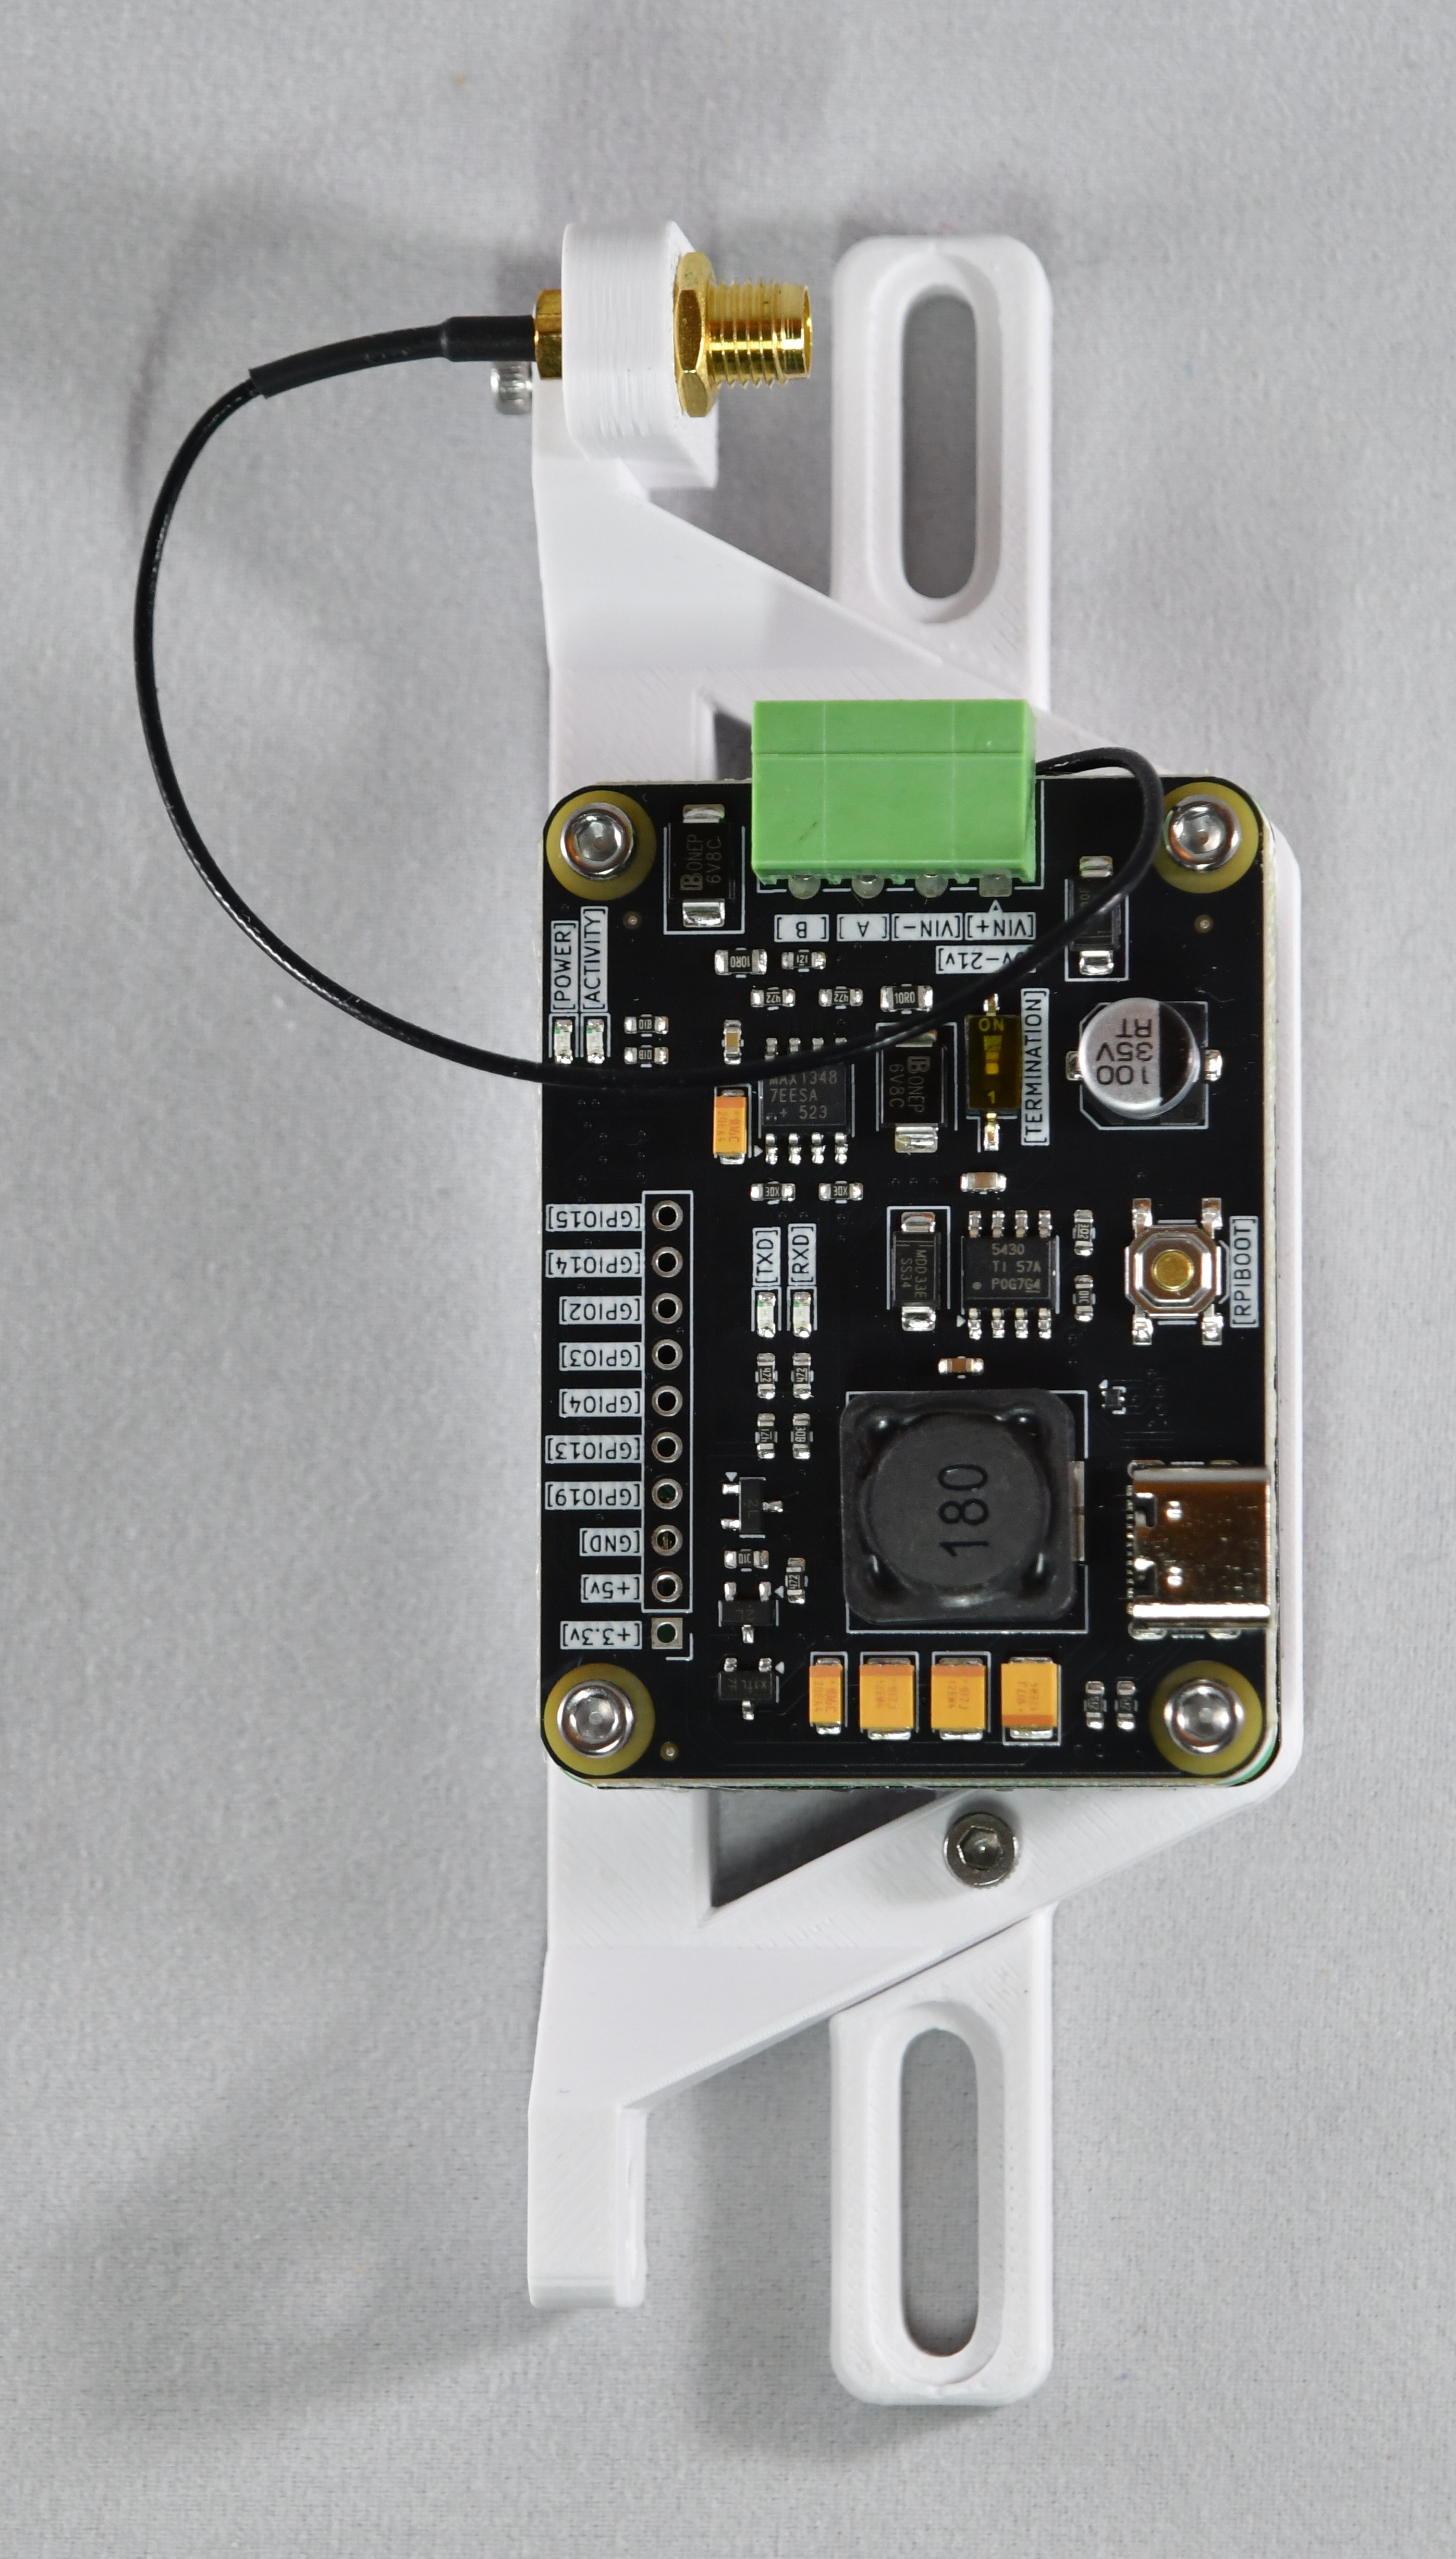
Antenna Pigtail Mount options.
Below is an example of everything mounted